 Return to Review Dungeon
|
December, 2 2025 |
 |
Baldur's Gate DEVELOPER: Bioware PUBLISHER: Black Isle and Interplay RELEASE DATE: December 21, 1998 COMPLETION TIME: 60 hours RATING: A |
 Review Navigation
Main Review
 Baldur's Gate is an isometric, real-time with pause, computer role-playing game developed by BioWare and published by Interplay in 1998. The game is set in the Forgotten Realms dungeons
and dragons campaign setting and uses second edition AD&D rules. In Baldur's Gate, you control a party of up to six characters as you explore the region of the Sword Coast on Faerun. Throughout the game you will explore a vast open world, talk to interesting and
colorful NPCs, complete quests, delve into various dungeons, engage in the tactical real-time with pause combat system, and solve an iron shortage conspiracy that unfolds as you progress the story. A little less than a year later, the expansion, Tales of the Sword Coast,
was released. This expansion added new locations, quests, items, NPCs, and raised the level cap to 161,000. This expansion contains some of the toughest battles and a massive dungeon that is much more intricately designed than anything from the base game. I will be covering
this expansion later in the review. Lastly, it's also worth mentioning that Baldur's Gate would see a re-release in 2012 as the Enhanced Edition.
The enhanced edition fixes some bugs, re-balances combat, adds new companions with new dialogue and quests, and some other minor changes. The enhanced edition is a great way to play Baldur's Gate if you want the easiest and most accessable version.
For my review however, I am just covering the original game and the expansion. The enhanced edition is great, but I want to keep this review focused on covering the original experience, so, due to the many changes in the enhanced edtion, I won't be covering it.
Baldur's Gate is an isometric, real-time with pause, computer role-playing game developed by BioWare and published by Interplay in 1998. The game is set in the Forgotten Realms dungeons
and dragons campaign setting and uses second edition AD&D rules. In Baldur's Gate, you control a party of up to six characters as you explore the region of the Sword Coast on Faerun. Throughout the game you will explore a vast open world, talk to interesting and
colorful NPCs, complete quests, delve into various dungeons, engage in the tactical real-time with pause combat system, and solve an iron shortage conspiracy that unfolds as you progress the story. A little less than a year later, the expansion, Tales of the Sword Coast,
was released. This expansion added new locations, quests, items, NPCs, and raised the level cap to 161,000. This expansion contains some of the toughest battles and a massive dungeon that is much more intricately designed than anything from the base game. I will be covering
this expansion later in the review. Lastly, it's also worth mentioning that Baldur's Gate would see a re-release in 2012 as the Enhanced Edition.
The enhanced edition fixes some bugs, re-balances combat, adds new companions with new dialogue and quests, and some other minor changes. The enhanced edition is a great way to play Baldur's Gate if you want the easiest and most accessable version.
For my review however, I am just covering the original game and the expansion. The enhanced edition is great, but I want to keep this review focused on covering the original experience, so, due to the many changes in the enhanced edtion, I won't be covering it.
 The first thing the player must do, like any good D&D adventure, is create their character. You pick your gender, race, class, alignment, and roll your starting attributes.
Once you finish creating your character, the adventure begins. In the small quiet province of Candlekeep, your character, a young ward, awakes to start their new life. Under the guidance of your mentor, Gorion, you have lived a comfortable life within the protected walls of Candlekeep.
Something sinister is stirring in the Sword Coast, and Gorion believes that it is no longer safe for you here. Unsure as to why but trusting in your master's wisdom, you leave with him. Entering the harsh and unforgiving wilderness and starting your new life as a hardened adventurer.
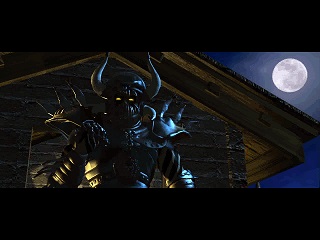
When you leave with Gorion, you are ambushed by a large knight in strange looking armor. He and his entourage of guards attack. Gorion fights back to protect you, but dies in the skirmish. You manage to slip away unseen and must journey onward alone. Your only lead is to
meet some old friends of Gorion at the protected fortress of the Friendly Arm Inn. What follows is a slow unraveling story about an iron shortage conspiracy that takes you up and down the Sword Coast. You will visit many locations, from the Friendly Arm Inn, to the bustling
city of Beregost, to the small mining town of Nashkel, the bandit camp in the north, the spider infested Cloak wood, and eventually to the city of Baldur's Gate itself. Throughout the story you will uncover what's going on with the iron shortage, who is behind it all, and your true heritage.
The first thing the player must do, like any good D&D adventure, is create their character. You pick your gender, race, class, alignment, and roll your starting attributes.
Once you finish creating your character, the adventure begins. In the small quiet province of Candlekeep, your character, a young ward, awakes to start their new life. Under the guidance of your mentor, Gorion, you have lived a comfortable life within the protected walls of Candlekeep.
Something sinister is stirring in the Sword Coast, and Gorion believes that it is no longer safe for you here. Unsure as to why but trusting in your master's wisdom, you leave with him. Entering the harsh and unforgiving wilderness and starting your new life as a hardened adventurer.
When you leave with Gorion, you are ambushed by a large knight in strange looking armor. He and his entourage of guards attack. Gorion fights back to protect you, but dies in the skirmish. You manage to slip away unseen and must journey onward alone. Your only lead is to
meet some old friends of Gorion at the protected fortress of the Friendly Arm Inn. What follows is a slow unraveling story about an iron shortage conspiracy that takes you up and down the Sword Coast. You will visit many locations, from the Friendly Arm Inn, to the bustling
city of Beregost, to the small mining town of Nashkel, the bandit camp in the north, the spider infested Cloak wood, and eventually to the city of Baldur's Gate itself. Throughout the story you will uncover what's going on with the iron shortage, who is behind it all, and your true heritage.
|
Candlekeep
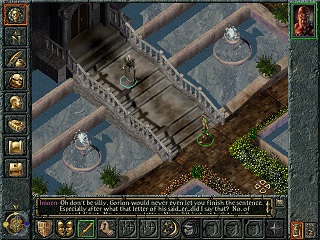
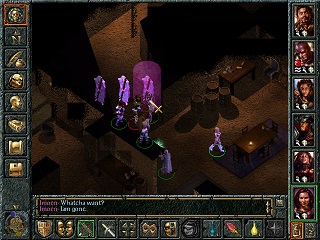
The starting location, Candlekeep, serves as a great introduction and tutorial on how the game plays. The layout is a circular area that is easy to navigate. Right at the start there is the tavern. Inside you can chat with the innkeeper who jokes with you and shows clearly that you've known each other for a long time. This helps further establish your character's roots in their home, Candlekeep. Here you can also buy some starting equipment with the small amount of money you have. If you want, you can buy what you need right here, and then head straight to Gorion to leave while ignoring all of the tutorials and optional quests. This helps immensely with replayability. If you chose to indulge with the tutorial however, you can earn some xp and a few other useful items to help make the start of your journey a little easier. |
World and Dungeon Design - Baldur's Gate's gameplay mostly consists of combat, exploration, and dialogue. There aren't any puzzles (aside from Durlag's Tower from the expansion). The dungeons, while still maze-like, are not very difficult
to navigate due to the zoomed out camera and there being no puzzles or hidden switches. Unlike in past RPGs and dungeon crawlers, there is no need to map out dungeons and it's not first-person with grid based movement. This does help streamline the dungeon crawling
experience and make the game feel more like Diablo than a classic dungeon crawler. I don't mind personally, I think there is room for these varying types of RPGs. You can have more classic, traditional dungeon crawlers like the goldbox games and Wizardry. The more basic,
straightforward hack 'n slashes like Diablo. And something in between like Baldur's Gate which has the complexity in the mechanics and combat as a traditional CRPG, while still being more fast paced and streamlined like Diablo. I also wouldn't necessarily call Baldur's Gate
a dungeon crawler, since the dungeons are such a small portion of the actual game. It's also able to get away with more simple dungeons, due to there being so much more to the game than just dungeons.
Many dungeons weren't designed as well as they could have been. There are a lot of tight corridors and winding paths that lead to dead ends. This very compact and maze-like design is common for dungeon crawlers of the time. However, those usually played either in first-person
or top down perspective. This makes it easier to navigate small snaking tunnels without the camera perspective getting in the way. Baldur's Gate, on the other hand, being isometric and controlling a party that all are individual characters that move independently, doesn't work
as well with this style of dungeon design. I believe that these dungeons may have been made early in development, before it was known how the party movement would work throughout the environment. Then it was never changed, possibly because they ran out of time or thought that
it wasn't worth re-designing the dungeons due to how small their contribution was to the game. At least, however, this area of design would be something greatly improved upon in the expansion and in the sequel.
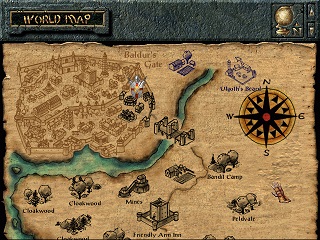 The over-world exploration is where you will spend most of your time in Baldur's Gate. The game world is set in the Sword Coast Region in Faerun. The map consists of many different locations from forests, towns, dungeons, rocky dry peaks, ruins, and the titular city of Baldur's Gate itself.
While the world offers a good variety of interesting locations, NPCs, and quests, it's a common criticism that the world has too many similar looking forests that provide little or no interesting quests or encounters, in between the locations that are actually worthwhile.
I believe that having these extra forest environments is a bit of a double edged sword. They can help make the world feel more realistic and make the traveling aspect feel more like an adventure and a challenge to overcome as you trek through the woods to reach your destination.
However, it is only needed to traverse through these forests one time each. This is because the game lets you fast travel to any visited or discovered location at the cost of fatigue and a possible enemy encounter. This makes the many forests that you must traverse through,
a mostly early game necessity. This was most likely an intentional design decision. In the early game, the random encounters in the forests yield much more valuable experience and gold. Once you get higher level and have better gear, the meager rewards from the random encounters don't
matter much anymore, so being able to skip them when you want to travel to a specific location, works in favor of the design philosophy. The forests are not all there is to see in the Sword Coast, however. You will also be wandering around the various towns and cities of the region.
This is where you will pick up most of the quests as well as providing shops to purchase equipment, and inns to rest your party.
The over-world exploration is where you will spend most of your time in Baldur's Gate. The game world is set in the Sword Coast Region in Faerun. The map consists of many different locations from forests, towns, dungeons, rocky dry peaks, ruins, and the titular city of Baldur's Gate itself.
While the world offers a good variety of interesting locations, NPCs, and quests, it's a common criticism that the world has too many similar looking forests that provide little or no interesting quests or encounters, in between the locations that are actually worthwhile.
I believe that having these extra forest environments is a bit of a double edged sword. They can help make the world feel more realistic and make the traveling aspect feel more like an adventure and a challenge to overcome as you trek through the woods to reach your destination.
However, it is only needed to traverse through these forests one time each. This is because the game lets you fast travel to any visited or discovered location at the cost of fatigue and a possible enemy encounter. This makes the many forests that you must traverse through,
a mostly early game necessity. This was most likely an intentional design decision. In the early game, the random encounters in the forests yield much more valuable experience and gold. Once you get higher level and have better gear, the meager rewards from the random encounters don't
matter much anymore, so being able to skip them when you want to travel to a specific location, works in favor of the design philosophy. The forests are not all there is to see in the Sword Coast, however. You will also be wandering around the various towns and cities of the region.
This is where you will pick up most of the quests as well as providing shops to purchase equipment, and inns to rest your party.
 |
|---|
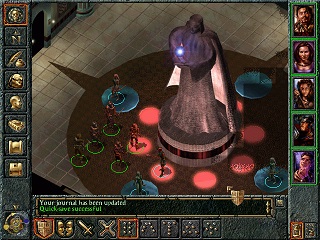
| Fighting Davaeorn in the depths of the Cloakwood Mine. |
Combat and Real-Time With Pause Mechanics - Baldur's Gate uses a semi turn-based real-time combat system that allows the player to actively pause when needed to help with tactical decision making. The active pause gives the player a chance to give commands to their
party members, then when they un-pause, the characters' actions will play out, as commanded. While combat occurs in real time, there are still turns and rounds that must play out at different time intervals. So, if you have your mage cast a spell, they will have to wait up to about 6 seconds
until it is their turn
to cast the spell. This style of combat, called real-time with pause (RTWP), was quite unique for the time. It allows for the chaotic and eye-catching combat of an RTS while still keeping the rooted D&D systems and tactical complexity that you would expect from an RPG.
This system was not an entirely new concept in Baldur's Gate. It has been used in some games, such as Microprose's Darklands in 1992. BioWare was also heavily inspired by many RTS games such as Warcraft and Command & Conquer. This style of combat however, does not gel well with all RPG fans.
Unlike in a more traditional turn-based style, the real-time aspect can lead to more chaotic encounters. Even though the combat is technically in real-time, there are still rounds and turns behind the scenes. So if you try to command a character to attack or cast a spell, there may be a slight
delay since they must wait for their turn to start. This is all well and good, since it's necessary for the D&D systems to work as they are originally designed. However, since the combat is still real-time, each character (both party members and enemies) can perform their turns and move at the same time.
This leads to the chaotic nature of the RTWP combat style. Which can also lead to the game feeling more at times, like an RTS than an RPG. Some people may prefer this style of combat, some don't. I don't mind whether an RPG is turn-based or RTWP. As long as the combat is well designed and fun.
Baldur's Gate combat is still fun and enjoyable, as long as you take the effort to learn its systems and how to adapt to the RTWP combat. It may not have the satisfaction of each individual turn like in the Forgotten Realms Goldbox Series, but it is still very tactical and gives plenty of freedom to the player.
Also, the quicker pace of the RTWP combat, can work in Baldur's Gate's favor. The game contains a lot of trash mob fights as you traverse through the many forests of the Sword Coast. So being able to just click on some weak enemies and let your fighters go in and plow through them quickly, really helps keep
the exploration enjoyable, without being bogged down by constant random encounters, like in Pool of Radiance.
|
Breakdown of Real-Time With Pause Mechanics
|
 Art and Music - The environments are beautiful and still hold up well today. BioWare modeled 3d assets and landscapes, then rendered them all at an isometric angle into a 2d background. These renders were then stitched together, to create each of the maps that you traverse through in the game.
This allows the game to have environments that are much more detailed than what computers could actually run at the time. The same type of techniques were used for the character and monster sprites. Character models could be modeled and rendered at much higher detail than fully 3d games of the era.
A good example of the clashing styles of real-time rendered graphics and pre-rendered, is Final Fantasy VII. The environments in that game are all pre-rendered, and as a result, they look highly detailed with great lighting and textures. Whereas, the character models are all rendered in real-time.
This causes them to all look very blocky and jarring against the otherwise detailed backgrounds. Baldur's Gate uses pre-rendered graphics across the whole game, so this clashing of styles is never an issue. This helps give it a cohesive and timeless art style. The green and tranquil looking forests, calm traditional looking towns and provinces,
all help give the game a very classic fantasy vibe. As you traverse through these nice, serene woods, some areas like the lighthouse map, have rain and lightning. These effects really help add to the atmosphere and make the world feel more alive. There is also a day and night cycle, where during the day,
cities will be bustling and lively. While at night, most of everyone is gone to bed, aside from guards and the less decent folk. The street lights illuminating the dark and empty streets of the cities gives a very calming vibe as well.
Art and Music - The environments are beautiful and still hold up well today. BioWare modeled 3d assets and landscapes, then rendered them all at an isometric angle into a 2d background. These renders were then stitched together, to create each of the maps that you traverse through in the game.
This allows the game to have environments that are much more detailed than what computers could actually run at the time. The same type of techniques were used for the character and monster sprites. Character models could be modeled and rendered at much higher detail than fully 3d games of the era.
A good example of the clashing styles of real-time rendered graphics and pre-rendered, is Final Fantasy VII. The environments in that game are all pre-rendered, and as a result, they look highly detailed with great lighting and textures. Whereas, the character models are all rendered in real-time.
This causes them to all look very blocky and jarring against the otherwise detailed backgrounds. Baldur's Gate uses pre-rendered graphics across the whole game, so this clashing of styles is never an issue. This helps give it a cohesive and timeless art style. The green and tranquil looking forests, calm traditional looking towns and provinces,
all help give the game a very classic fantasy vibe. As you traverse through these nice, serene woods, some areas like the lighthouse map, have rain and lightning. These effects really help add to the atmosphere and make the world feel more alive. There is also a day and night cycle, where during the day,
cities will be bustling and lively. While at night, most of everyone is gone to bed, aside from guards and the less decent folk. The street lights illuminating the dark and empty streets of the cities gives a very calming vibe as well.
The soundtrack of Baldur's Gate, composed by Michael Hoenig, is beautifully crafted. From the calming travel music when traversing through the forests, the jaunty tunes of walking through the cities, the chilling and dreamlike music of the visions at the start of each chapter, to the frantic battle tunes, it is all
excellent music that will stick with you long after you finish the game. The track I used for the review is just a small sample of this game's exceptional soundtrack. If you want to hear it in full, I recommend checking out Khinsider. It's a great website for finding video game music.
Story and Worldbuilding - The land of the Sword Coast is harsh and unforgiving. Bandits have taken over much of the surrounding areas outside of the towns. Due to the iron shortage in the region, they're after iron instead of gold. Guards patrol the forests as well, stopping any less than trustworthy looking folk, such as your party, from entering the towns, causing you to have to prove you're not a bandit before even entering the town. What is this iron shortage all about? It's affecting all the working class and common folk across the region. Khalid and Jaheria, Gorion's old friends that you met back at the Friendly Arm Inn, say that it's worth checking out. So you head onward to the town of Nashkel, a small province that is also home to an iron mine. The iron coming from this mine however, is tainted. It's become brittle and useless. The guards would go in to investigate, but the mine is infested with Kobolds and no one wants to risk it. So it's up to you and your brave party of adventurers to delve in and find out what's going on. Before we get to that, however, back at Nashkel you would have encountered one of the many bounty hunters that are after you. Someone wants you dead, and this is the third assassin sent so far. Each bounty hunter seems to get tougher, and the bounty gets higher. This adds a reminder throughout the story, that someone is after you, and nowhere you go is safe. They also act as a good test of whether the player is prepared for this point of the game or not, by forcing you to overcome this battle in order to proceed. Also, shortly after this battle, you would have witnessed your first of many dreams. These narrated dream sequences, whisk you away from reality briefly, to give some foreshadowing on what's to come, while also explaining that there is some greater power that is trying to influence you. You are not sure what this is about yet, but in time, it will become clear.
 |
|---|
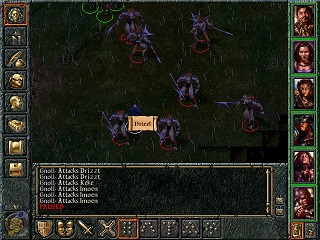
| Meeting Drizzt Do'Urden fighting off a pack of gnolls. |
Along the way you will come across various side quests and minor encounters with some interesting characters. Such as the ruins of an old school that is full of undead patrolling the outside. One such undead is a crazed skeleton who approaches your party ranting about wanting to taste blood before attacking your party and dying rather easily. Patrolling through the forests, you may also come across Drizzt who is busy fighting a large pack of gnolls and, upon approach, calls for your party to help. Although he obviously doesn't need the help, it's cool to have the chance to fight alongside one of the most iconic characters in the Forgotten Realms. There are many more fun little encounters like these throughout the game that keep things interesting as you traverse the through the Sword Coast. It's also important to bring up the intentional loot placement in Baldur's Gate and in the other Infinity Engine games. Exploring around each different area in the game world yields its own rewards, without needing a quest to guide you. Some of the best items in the game can be found in ordinary locations off the beaten path or sometimes well hidden in plain sight. For example, just south of Nashkel you can come across someone named Zal and his friend who will claim Zal is the best dart thrower in the West. If you kill him, he drops one of the best bracers in the game that grants +2 THACO for missile weapons. Another example is a painting in the Helm and Cloak inn at the city of Baldur's Gate hides one of the best helmets, the Helm of Balduran. Even Drizzt, if you manage to kill him, can drop a one-of-a-kind armor piece and two of the best scimitars in the game. This method of item placement encourages players to explore and look around every corner, as you never know what kind of gear you will find. I much prefer this type of loot placement in an RPG instead of random loot in other games like Diablo. It ensures that the player is actually rewarded for their efforts and gives the designer more control over how the player obtains more powerful gear. If you want to get that epic magical sword, you have to kill the dragon. There is no random chance that it will drop, or a situation where you already have some slightly different variant of that sword that dropped randomly from some other enemy so now the weapon is mostly useless and no longer special. There is only one type of each magical weapon, and you have to find it or kill a specific enemy to be rewarded with it. This also helps with replayability, since you know on future playthroughs where specific items are found, so you don't have to grind and hope you get a lucky drop, you just go to where you need to go and get the item.
Once you reach the city of Baldur's Gate, there is a whole new area with multiple districts to explore within the city. The size of this city is staggering compared to the rest of the game. You also don't gain access to this area until chapter 5 which is about 70-80% way into the main story. This makes it quite an overwhelming big chunk of the game to tackle after having spent all of this time exploring the rest of the map. Especially so, depending on how much side content you've completed up to this point. Either way, the City of Baldur's Gate is still impressive with many new side quests, buildings, and interesting characters to meet. You will also encounter a few new potential companions as well. Baldur's Gate contains quite an extensive list of companions across the game, from the beginning after you leave Candlekeep, all the way to the main city itself. This offers the player many options for party members throughout the game in case you want to switch someone out or if a party member dies permanently and needs to be replaced. While the companions don't have as in depth backgrounds or much in the way of dialogue with the player like in similar future RPGs like Baldur's Gate 2 or KOTOR, they still have unique and interesting personalities that set them apart and serve their purpose for role-playing and party composition options.
Conclusion - Baldur's Gate is a landmark in the CRPG genre. The story, while may not seem like much at first, is quite good as more and more of the truth unravels and Sarevok begins to reveal himself. The world, while can be a bit monotonous at times due to the amount of forest environments, is well designed with many unique items, quests, NPCs, companions, and locations to discover. The music and sound effects are high quality and stand out even to this day. The soundtrack by Michael Hoenig is fantastic with many memorable tracks and the atmospheric sounds such as birds singing, wind blowing through the trees, the silent crickets at night, and the background chatter in towns, that all help the game come alive. The combat system, while can take some getting used to, is fun and well paced while still being tactical. The RTWP system was quite innovative for its time and I believe that it helps keep the low level and open nature of the game from feeling too slow or repetitive. Being able to control the speed and level of tactical control of each battle, allows you to breeze through easy fights quickly, while also taking your time and utilizing full control when needed in tougher fights. In the end, Baldur's Gate is definitely a must play for RPG fans and remains a classic to this day. Of course, the saga does not end there. Continue reading for my review on the expansion, Tales of the Sword Coast.
Tales of the Sword Coast
Introduction - The expansion for the original game released in 1999, adds new locations, items, quests, as well as an XP cap increase. The additional content is accessed and takes place separately, outside of the main story and original game progression. The new content is also much more difficult than most of the main game with new more powerful items as well. The main hub of the expansion
is a small village called Ulgoth's Beard
. From here you can talk to people and gain new quests to embark to new locations. These new places are quite unique, their quality, however, varies. The three most notable locations that I will talk about are a remote ice island, the werewolf island, and Durlag's Tower.
 The Magical Ice Prison - The least interesting and shortest venture is the ice island. A mage will await your approach at Ulgoth's Beard and ask that you retrieve his cloak from a magical ice prison full of other mad magicians. He would do it himself, but he has far more important matters to attend to, and your party should get the job done just fine.
If you agree, he will teleport you to this mysterious island where you will meet some mages that have been trapped there for quite some time. You are able to have some lengthy conversations with them, but regardless of what you say, you will be forced to kill all of them. The battles against these mages can be tough. They can cast dimension door, confusion, horror, and have many spell protections.
The rewards for defeating these mages are not that great, and you don't even get to keep the cloak at the end. This area really just feels like more of a combat challenge to test your skills and it ends rather quickly as the dungeon is not very large. I do find that battles against enemy mages can be fun in these early D&D games however, so it was at least enjoyable for me to try and overcome the various types of spells they would sling at me. I do wish though, that there was something more worthwhile to find there, like a unique spell scroll that can only be acquired in that location.
The Magical Ice Prison - The least interesting and shortest venture is the ice island. A mage will await your approach at Ulgoth's Beard and ask that you retrieve his cloak from a magical ice prison full of other mad magicians. He would do it himself, but he has far more important matters to attend to, and your party should get the job done just fine.
If you agree, he will teleport you to this mysterious island where you will meet some mages that have been trapped there for quite some time. You are able to have some lengthy conversations with them, but regardless of what you say, you will be forced to kill all of them. The battles against these mages can be tough. They can cast dimension door, confusion, horror, and have many spell protections.
The rewards for defeating these mages are not that great, and you don't even get to keep the cloak at the end. This area really just feels like more of a combat challenge to test your skills and it ends rather quickly as the dungeon is not very large. I do find that battles against enemy mages can be fun in these early D&D games however, so it was at least enjoyable for me to try and overcome the various types of spells they would sling at me. I do wish though, that there was something more worthwhile to find there, like a unique spell scroll that can only be acquired in that location.
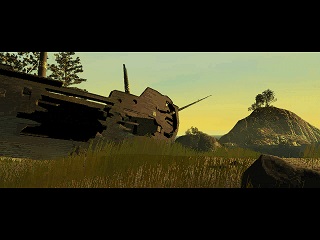
The Isle of Balduran - The next main quest is at a small secluded island in the trackless sea. A curious fellow will ask you to travel to a far away island in search of knowledge as well as locating the ship of Balduran. Your payment, should you accept, is you can keep any artifacts you find. If you agree, you must first make a short stop at the city of Baldur's Gate to acquire sea charts. Once the charts are collected, you return to the village, and off you go to set sail through the trackless sea. During your voyage, there was an awful storm which tore apart your ship. You and your party manage to survive and use the debris to float over to land. When you finally arrive at the isle, you explore around to locate a small village. The island itself is rather small. It consists of the main village area, a central section, and a northern section. You first enter the main village and right away you will probably realize that something is off. The way the villagers react to you, the way they talk almost like speech is difficult to them, and all of the werewolves around the island. You speak to the leader and she tells you that they are suffering from werewolf attacks and asks you to find the source and slay them. The villagers also have a ship that they will let you board with them if you stop the werewolves. So with no other choice, you agree, and head onward. This of course leads you to the wrecked ship of Balduran, which is the main reason you came here in the first place. Inside of the ship you encounter dire wolves, werewolves, and the greater wolfwere, Karoug. The greater wolfwere is actually quite a tough fight. He has accelerated healing abilities so you must do enough damage to beat out his healing ability, in order to actually kill it. This requires you to use practically everything in your disposal to really rain hell on the creature. The wand of heavens which you can buy at Ulgoth's Beard, really helps with this fight I found. If you have a druid or cleric in your party, they can use it and it casts a cone of fire on a target, dealing a significant amount of damage. It was a pretty enjoyable fight that played out differently than what you've dealt with thus far.
 |
|---|
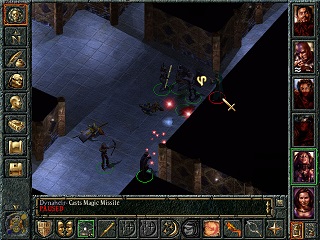
| The entrance to the wrecked ship of Balduran. |
With that taken care of, you return to the village with the news and it's revealed that the villagers are not as innocent as they claimed to be and are in fact actually werewolves themselves, who would have guessed. Well also guess what, you and your party are now infected with lycanthropy so if you don't get your butts home soon, you'll turn into a werewolf which is essentially game over. So you fight through more werewolves and make your way through the cave system and outside to the dock where their ship awaits. The headwoman, Kaishas, has stolen the sea charts from you, and she is about to depart. With no other choice you attack and slaughter the last of them. Home free at last. When you arrive back at the mainland, things do not go as planned however. It turns out you were sent under falsehoods and were used to Kill Karoug and bring Kaishas back to the mainland. Of course, however, that didn't work out and you instead slaughtered all of the werewolves and escaped yourself. Perhaps if the people didn't reveal that they were lycans and infected you, then things would have worked out differently. Oh well, now you return and Mendas is angry. The two turn into werewolves and attack. With them killed, your lycanthropy is cured and the nightmare is over. I enjoyed this little side venture actually, more than the first time I played it. Playing this after going through Durlag's Tower definitely helped as I was much higher level and better equipped. Going through the wrecked ship of Balduran and fighting the werewolves through each deck is always fun. Also werewolves are just cool in general so that gives it a big plus. The only downside is that you acquire a lot of good gear that is only effective against lycanthropes. So once you leave the island, none of the items you got aside from a few minor additions are worth using anymore. Also It's rather annoying and stressful that you become infected with lycanthropy and there is actually a hidden timer that is set. So if you don't get back to the mainland and kill Mendas in time, then you will turn into a lycan and get a game over. I never had that happen to me thankfully, but the fact that it can and ruin your save, is pretty bad in my opinion.
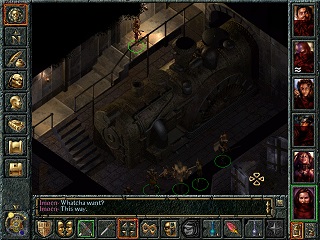
Durlag's Tower - High in the misty mountains of the cloud peaks, is an old fabled keep. The story goes that a dwarf named Durlag Trollkiller was a powerful being, renown for killing trolls and other horrifying creatures. After retiring from his adventures, he built a tower where he could be safe and raise his own clan of dwarves. One day, his tower was attacked by mind flayers who were after his riches and gold. Each of Durlag's kin were assassinated and replaced by doppelgangers. By the time he found out, it was too late. He had no choice but to kill each of his kin including his wife and child, until all but two remained. This drove him mad, and he made sure to make his tower as impenetrable as possible so no intruder could possibly breach his home and live. He hired the best craftsmen across Faerun to build all kinds of malicious traps and labyrinths throughout the depths of the tower. Each room is blocked by a wardstone that is guarded heavily. He stayed isolated in his protected tower for hundreds of years until he eventually died. Now his spirit still haunts this place, using powerful magic to kill anyone that dares enter his sacred tower. You get a quest from a strange dwarf in the Ulgoth's Beard inn who asks that you return his granda's dagger from Durlag's Tower. This is one of the ways you can be prompted to enter the tower. There is also a tour guide you can meet in the village who asks for 60 gold to guide you through the tower, explaining its full history but little about the dangers of the place. Either way, you will be able to travel to Durlag's Tower anytime you want. Once you arrive, you must first traverse through the mountain passageway which is guarded by battle horrors. These guys are pretty tough and do a good job testing the player's skill before they enter the tower itself. The layout of the tower comprises a ground floor, three upper levels, and 4 lower dungeon levels. The upper levels are light on loot and notable events. There is a small quest to complete involving a nymph who is trapped in the tower and a tome of understanding which is one of the few permanent stat increasing books. Once you delve into the dungeon through a secret entrance in the cellar, that's when the real challenge begins
 |
|---|
| A strange machine built inside of the tower. |
Level 1 of the dungeon is pretty straightforward and not too difficult. You explore around the different rooms with a few enemies and traps here and there. Your goal is to solve 4 riddles which are not that difficult to figure out. They just involve interacting with various objects and scenery in the environment. As you explore these rooms and in the later areas deeper in the dungeon, more of Durlag's past life is revealed to the player. Through environmental story telling, books and journals, and ghostly appearances the player learns more about Durlag and what happens to him in his tower. Even though you already probably heard the whole story from the tour guide or other people in town, these extra bits of information give you more personal experiences and deeper looks into Durlag's personal life, making the story feel more engaging. It also helps you understand Durlag better once you reach the final level of the dungeon. Once you complete all 4 riddles and return to the dwarves in the center room, they awake from their ghostly form and attack. This battle against the four dwarves is actually quite tough and might catch you off guard considering how easy the rest of the tower was up to this point. Each of the four dwarves represent different aspects of Durlag's emotional state; Avarice, cowardice, pride, and love. Each dwarf has varying stats and abilities making the battle require some strategy and preparation. I found that the best way to deal with them was to first pre-buff casting protection against evil, defensive harmony, barkskin, haste, and on my mage globe of invulnerability. Then, after starting the battle, send my party to the nearest hallway so I can funnel the dwarves in one by one. This helped immensely for me since the battle starts in a wide open arena where you can be attacked at all sides, so retreating to a funnel helped give me a much needed advantage. Once they are dealt with, you must collect the wardstone which is needed to continue to the next level. Each level of the dungeon is magically blocked by a wardstone so you must complete the puzzle or fight of each level in order to proceed.
Level 2 starts to make things more interesting. Each room throughout the dungeon has magically blocked doors. The only way to open them is to find the wardstones and by interacting with certain objects in the environment. There are also quite a few surprise attacks from doppelgangers disguised as Durlag. Occasionally you'll be locked in a room and doppelgangers will appear inside casting cloudkill around them and some protection spells. These fights can be tough if you get unlucky with your saving throws as your party can be knocked out and killed quickly. This level of the dungeon may seem complicated at first, but it ends up taking you on a mostly linear path around the outer areas until you either find the exit or end up back around near the start. You can also find Kiel's helmet, buckler, and morning star which are great pieces of gear. The helmet is especially helpful if you have Kahlid in your party. Getting access to the stairs to the next level can be pretty tricky however because the exit wardstone is blocked by a trap that is only visible if your thief has high enough disarm traps skill. So you may miss it entirely and left lost wondering where it is.
 |
|---|
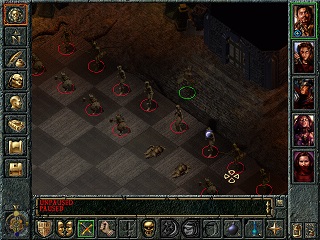
| The game of chess can be easily circumvented with protection against electricity and invisibility. |
Level 3 of the dungeon introduces trials that the player must complete in order to proceed. There are no wardstones to collect this time around, instead there are four battles that must be won; fire, wind, slime, and ice. These trials consist of fighting a few enemies that correspond to each element in a designated area. Aside from one, none of these trials are very difficult, especially considering what your party has fought up until this point. Once the final battle is won, your party is instantly teleported to the final fifth trial. It is a deadly game of chess where you must move your characters who act as pieces on the chess board, and take out the enemy king. If you break the rules and move to an incorrect space, then lighting will shoot at you. This game can actually be quite easily exploited by giving your character protection against electricity and invisibility. Then you can just strut right across the chess board and let the lighting kill the enemy team without them even getting a chance to move. The chess game is a cool idea, but I could never quite figure out how the rules work, so I always just come prepared to brute force it instead. It may seem like cheating, but I think it's cool that the game lets you be smart and break the rules if you know how. So with that taken care of, you're free to move on to level four.
The final level of the dungeon is less combat heavy than the previous levels. This area is more about exploration and learning more about the history of Durlag. You first come across what seems to be the spirit of Durlag. He tells you that you must have a deeper understanding of what happened at his tower, to proceed further into the dungeon. As you explore, you will find yourself summoned and imprisoned in a room where you must answer the truth of what happened to Durlag throughout each step of his betrayal. If you answer correctly, more of the dungeon will be open to you, until you can enter the final chamber that leads to the demon knight. Throughout the rest of this level you will also come across some of the best gear in the game located here. You can find a wand of monster summoning, Long sword +1 flame tongue, large shield +2, sling +3, and cloak of the shield. The items that the game rewards you are powerful enough that you feel significantly better with them, but not too powerful that you become a god afterwards, like in the sequel. The game is still able to keep the low level adventure intact while also making the dungeon still feel worthwhile and that your characters are more capable after going through it. Once you're ready to face the demon knight, you can head to the final room. When you enter, you'll run into a girl named Clair De'lain. She is one of the last remaining of her party that are alive in the dungeon. The rest of her friends went after the demon knight and died an agonizing death. The demon knight used some kind of magical mirror that creates duplicates of anyone that looks at it and will be attacked by their double. With this knowledge, you and your party prepare and head onward to face the demon. This powerful demon has taken his place as the new ruler of the tower, and now that your party has generously taken care of all the traps and monsters that roam this place, he can kill you and take over. This battle against the demon knight takes place in a large circular arena with an inner and outer layer. The mirror is placed in the center next to the demon knight. If you manage to destroy the mirror, then his doubles will no longer respawn and it makes the fight a little easier. Either way the fight was not that difficult in my opinion. Your party starts on the outer layer and the demon knight and his army start in the center. You can use the wand of monster summoning to spawn a small army to block the path connecting you and the center. Then cast spells and fire arrows at the monsters and the demon knight until they are dead. Then it's just a matter of mopping up the remaining stragglers in the area. I found the fight not that difficult, but still satisfying and climatic. however it's not over yet. Once you return to Ulgoth's Beard you have a much more difficult fight awaiting you.
 |
|---|
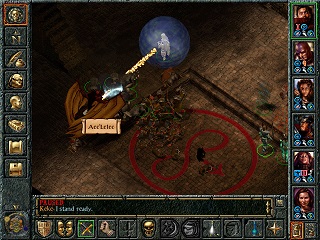
| The final battle against Aec'Letec. |
Upon returning to Ulgoth's Beard you are confronted by a band of cultists. They claim they need the soultaker to complete the ritual and take the dagger from your possession. You can try to protest but to no avail. They will attack your party for interfering. After mopping those fools, you find the dagger is missing. Upon returning to the inn and convening with your old dwarf friend, you learn that apparently they took it to an abandoned building in the village where they will use it to resurrect a powerful Tanar'ri named Aec'Letec. It's up to you and your party to stop them before it's too late. Inside of the abandoned building and downstairs into the basement you find the summoning circle where all the worshippers are located. You can try to talk to the lead cultist, but there's nothing you can do to stop the ritual. The demon is summoned and you must send it back where it came. This fight can go either really well or really bad. The demon can cast gazing attacks at your party so the first thing you need to prepare is potions of mirror eyes which you can buy from the inn. Once everyone is protected, the best strategy I found is to cast monster summoning to keep the demon distracted, while my fighter characters run around taking out each of the cultists surrounding the area. If you don't kill the cultists before killing the demon, then it will respawn. So you can't just rush in and hack away at it to win, you must take care of the cultists first. Once they are dead, then you can focus on the demon. Hopefully no one got held during the fight, leaving them stuck and vulnerable, but there is not much you can do to prevent that I found, other than just getting lucky. Actually killing the demon seems to be inconsistent. I attempted this fight multiple times, and many attempts I spent minutes attacking it with my fighters while they are hasted and using potions of heroism, and the demon refuses to die. While on my last attempt, it died almost instantly once the cultists were dead. I suppose that's just how it goes when everything is a dice roll. Well with the horrible creature dead, and a nice chunk of xp earned, the world is saved and your quest finally over. Durlag's Tower is really quite an experience. Each layer of the dungeon brings new surprises with intricate layouts, fun combat encounters, and some of the best loot in the game. The story that unfolds throughout the quest is intriguing and tragic as well. It also has two great final bosses, just in case the demon knight wasn't difficult enough. The dungeon design of Durlag's Tower is quite a step up from what you find in the rest of Baldur's Gate, and is taken to heart in the sequel as well. While it doesn't make up for the lackluster dungeons in the base game, it provides a satisfying and challenging end game quest for the player to embark on to really test their skills. As well as yeilding some powerful gear that will help greatly when completing the rest of the game.
TotSC Conclusion - Well that about wraps up Tales of the Sword Coast. Overall quite an enjoyable side adventure that will take you probably about 15-20hrs to complete. With the bulk of that time taken on Durlag's Tower. The expansion does a good job offering some truly difficult battles that much of the original game was lacking. While the ice prison and Isle of Balduran were nice diversions, the star of the show was of course Durlag's Tower. The design of the dungeon is leaps and bounds ahead of anything from the original game and is highly regarded as one of the best dungeons of any RPG. Personally I think that is a bit overpraised for Durlag. It is certainly not a bad dungeon though, and I found it very enjoyable for the most part. However, the riddles were a bit too easy and really just solved themselves. I also think it would have been more interesting if the demon knight had more of a presence throughout the dungeon. He was teased a bit at the beginning, but you never hear of him again or see him until the very end. If he popped up a few more times along the way to taunt or attack the player, like the Dreadlord from Secret of the Silver Blades, that would have really helped solidify him as a character and a threat. Otherwise I really enjoyed myself in Durlag's Tower and consider it one of the highlights of the Baldur's Gate 1 campaign. The rest of the expansion, while overshadowed by Durlag, is still enjoyable to complete and contain fun and challenging fights.
|
Grillsen Recommends: Highly recommended to all CRPG fans that enjoy a classic fantasy setting and a good low level adventure. The second edition AD&D rules may take a bit of getting used to if you are more familiar with newer editions or newer RPGs in general. Also the real-time with pause combat can be difficult to wrangle if your unfamiliar with it. Still if you prersevere, you will find one of the best CRPG sagas ever made which continues on through Baldur's Gate 2 and Throne of Bhaal. |
| Pros | Cons |
|---|---|
|
|
|
 Timeless pre-rendered 3d environments
